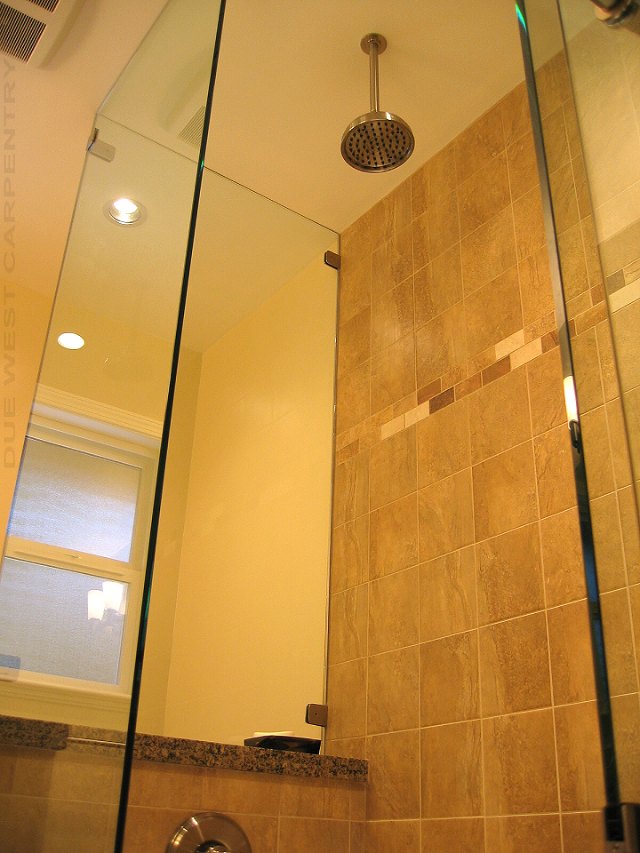
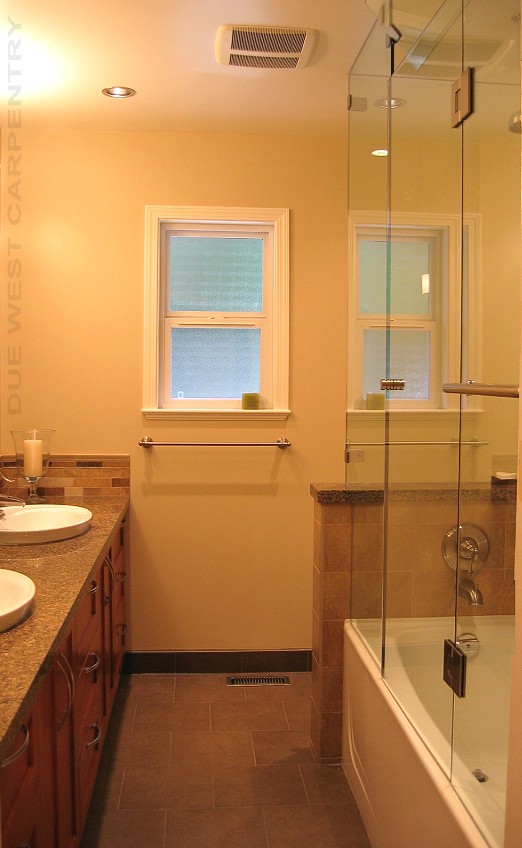
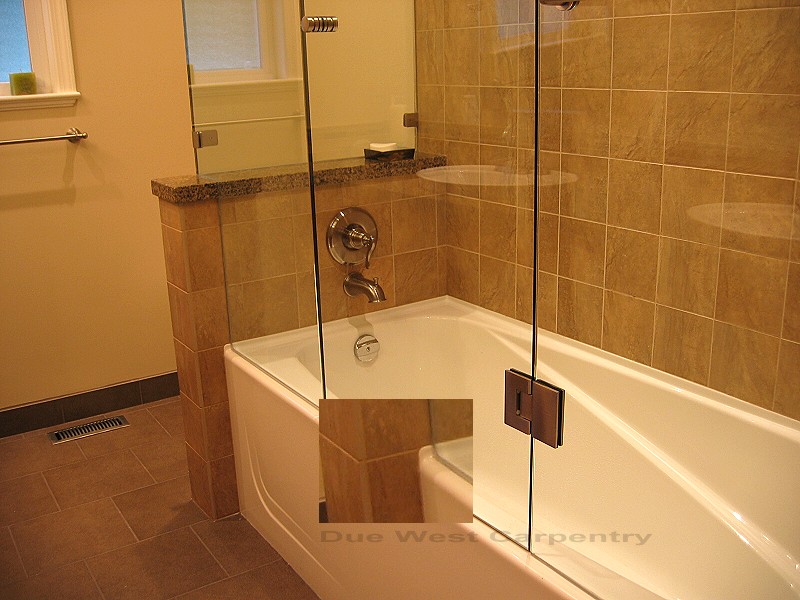
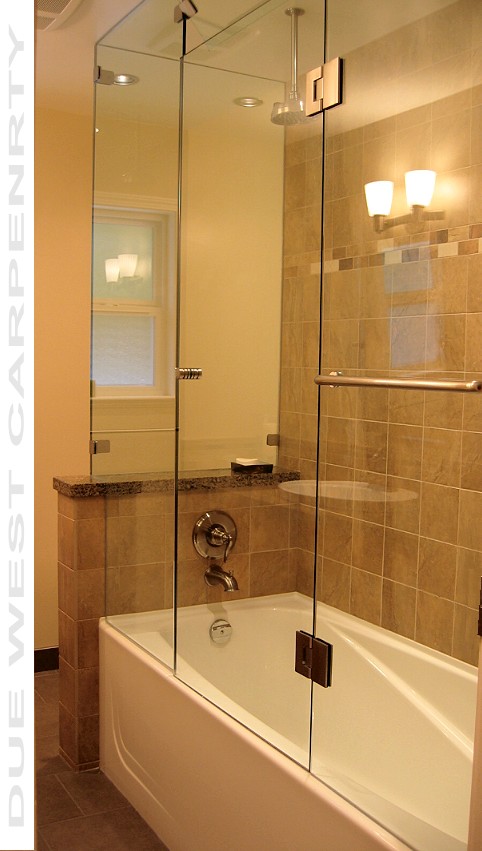
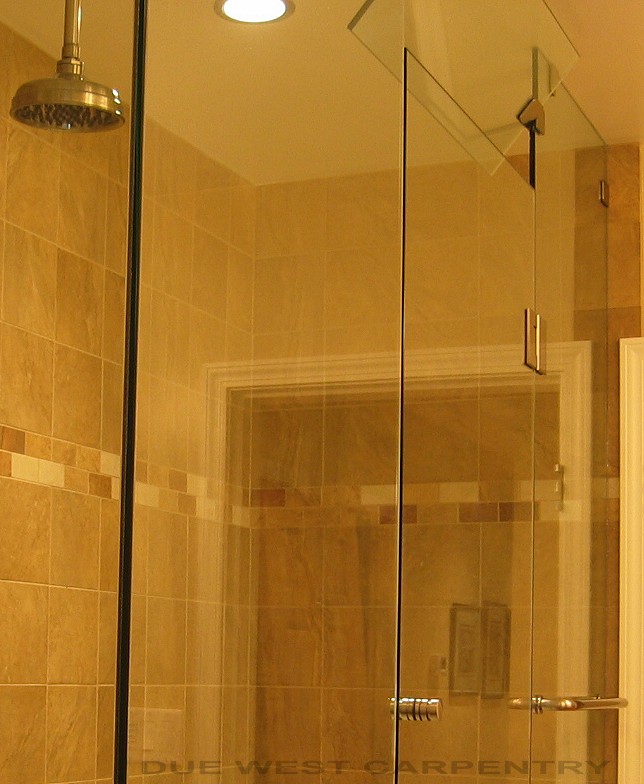
Points of Interest: You will notice that the 'Frameless' glass shower walls go from the tub to the ceiling. In order to let steam/moisture out of the tub location, an adjustable pivoting transom window was incorporated into the design. You may also notice that a towel bar was installed into the glass wall in order utilize the space effciently. This requires the mounting holes to be cut prior to the tempering and cannot be done 'after the fact'.
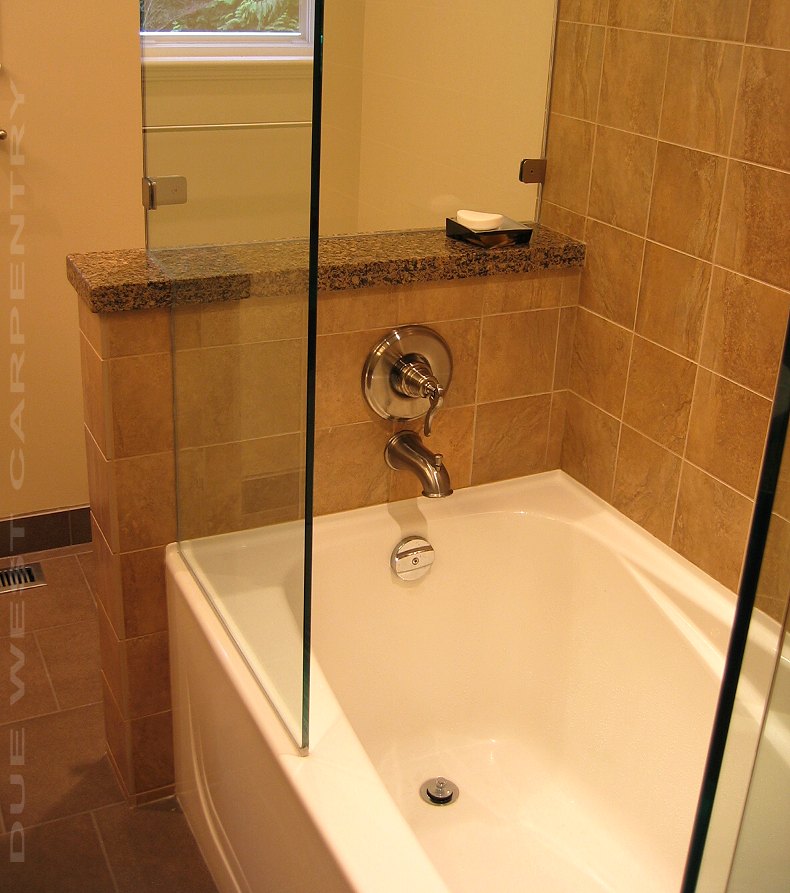
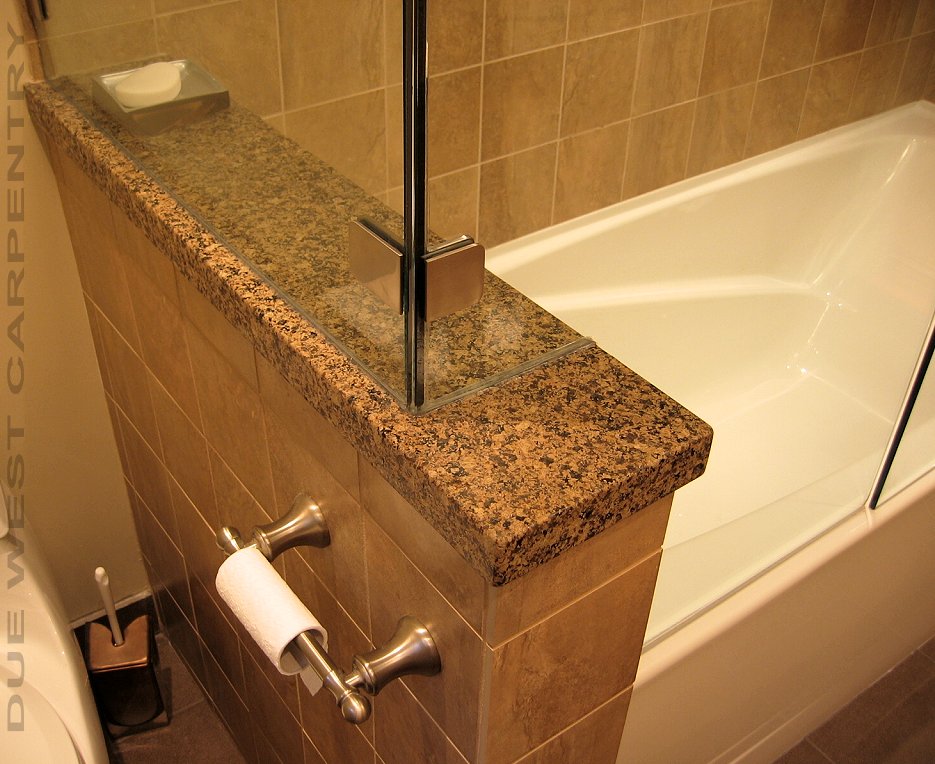
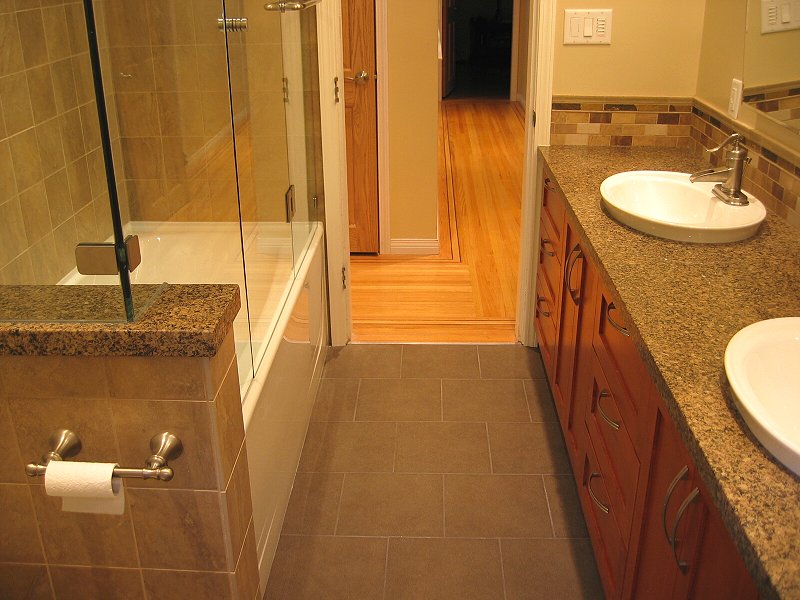
Design elements: Instead of tiling the top of the new 'pony wall' in the bath/shower, I suggested using a matching piece of counter top granite
which has a very nice effect, and with the glass shower wall installed near the outside edge, it created a functional shelf ledge to put soap dishes and accessories. The granite cap was installed with a 'slope' for water drainage.
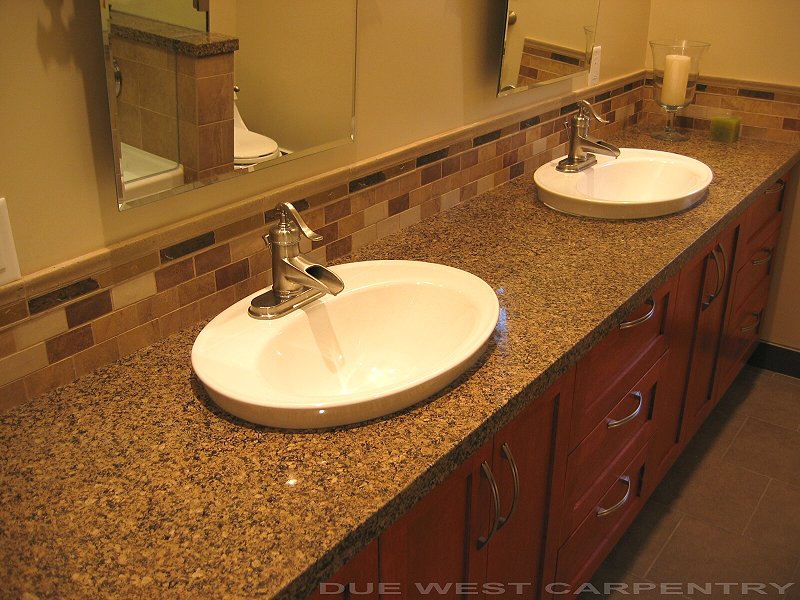
The Details: You may also notice that the overall 'Finished' width of the 'pony wall' perfectly matches the width of the porcelain tile that was used on the wall side. Since porcelain tile is only colored on the face and edges, when it is cut it shows its 'off white' core color which will stand out on wall ends and shower curbs. Some people use metal 'schluter' corners as a resolve for not using natural stone, but I don't care for the unnaturalness and colour of metal corners and edges.
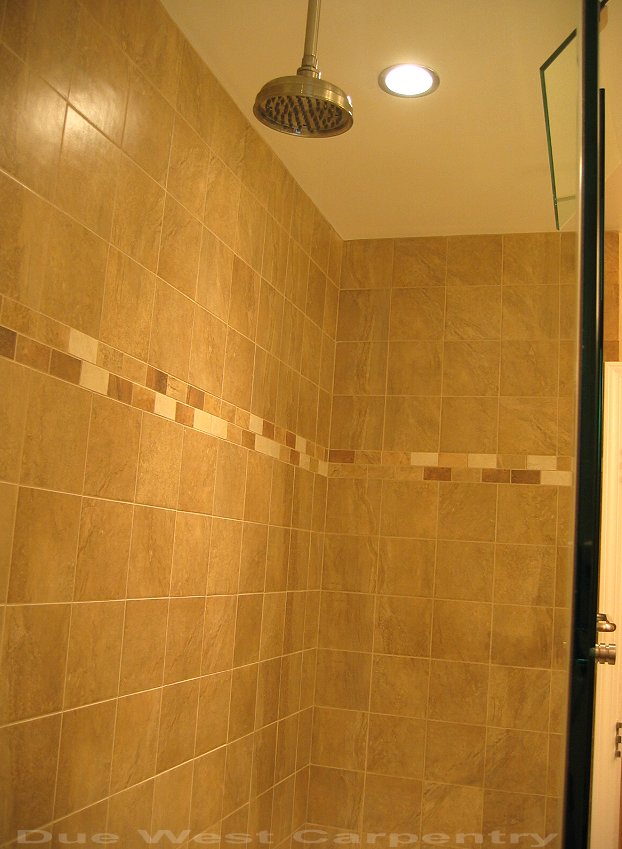
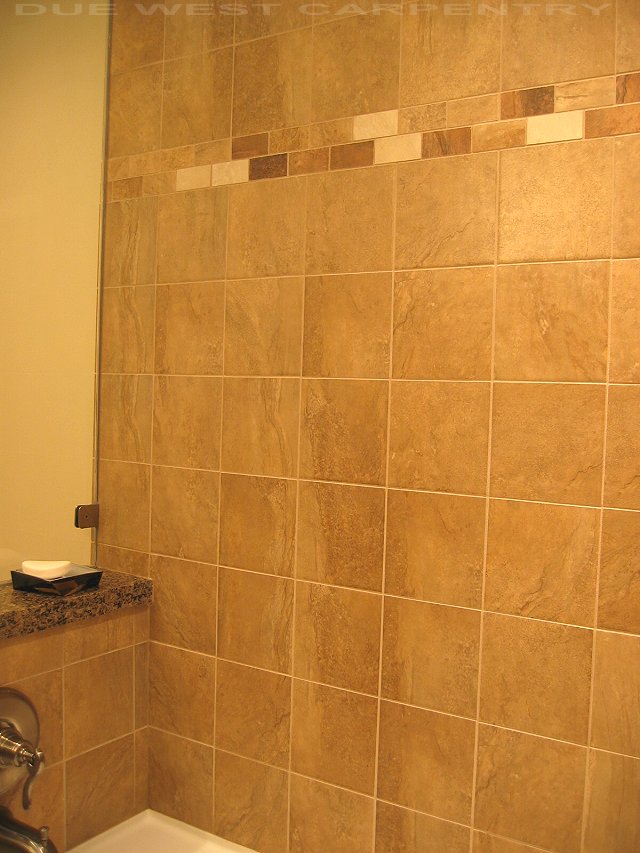
Since porcelain or ceramic tile is a man made rendering of something natural it usually only comes on average in 4-8 repetitious patterns. Meaning every 4th to 8th piece is going to look alike. If you have the experience, creativity, efficiency and patience you can 'place' these tiles in a fashion that will
make the tiles look a lot more natural as a 'collective whole' than just placing them which ever way they come out of the box.
|